To upload existing parts and assemblies to the server
Log on to the server in Creo
Create a New part/asm or Open the part/asm from the local address
RMB on the file name in the
model tree
Check in > Custom
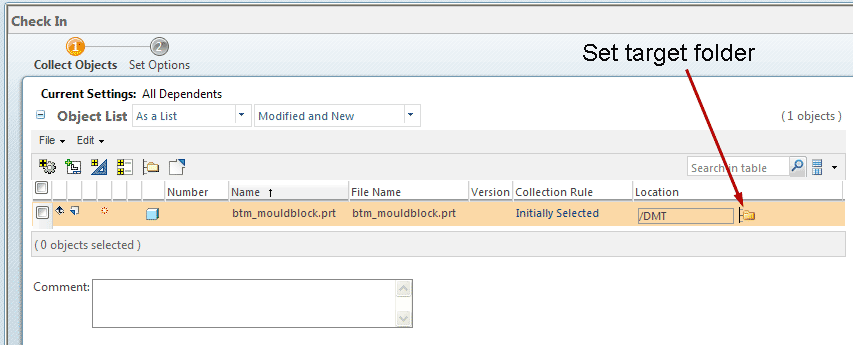
If your uploading an assembly you only need to check in the .asm file, all the associated (dependent) files will be automatically added to the list of files to upload.
Choose a folder to save the file to - see above image
If your checking in a number of files, say an .asm plus its dependents, then use the check box at the top of the list of files to select all the files then Edit > Set Location
In the Set Location window you can create a new folder
![]()
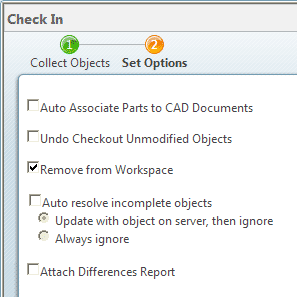
In the Next > Set Options window choose Remove from Workspace
This will close the file, remove from the working directory in Creo and remove from the Windchill Workspace. You should then Check Out the part from the server to continue editing. This process will make sure you are working on the 'true' version of the file and not a locally stored version.
Finish
Moving files
If you need to move a file to a different folder - commonly you've forgot to set the location when uploading - then:
select the file - left hand check box
Actions > Cut
navigate to the destination folder
Actions > Paste