![]() Design & Tech CAD
Design & Tech CAD
Boundary Blend tweaks
ISDX - Freeform surface modelling
Scoops, bulges and
split surfaces
Analysis
Rhino
Surface and Section Analysis
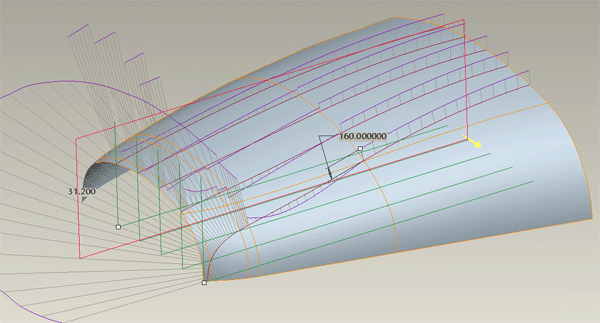
Much of the work in creating good surface models goes into fine tuning the curves and surfaces once they have been built. There are various formal analysis tools available but don't forget to use the most important one - your eyes.
Selection
The selection filter - bottom right of window - defaults to Smart or All. Is this mode you will have to Ctrl select the individual patches you want to analyse. Change the filter to Quilt to select whole quilts.
Visual analysis
Always make a visual analysis the first level - ultimately, that's all the consumer will do. To make a good visual analysis of your surfaces need to be a dark, high gloss finish with a directional light.
Through the render toolbar, turn off the default ambient light. Change the part colour to a dark colour with high reflectivity - there is a suitable colour already set up in the appearance window.
Also turn off your datum curves so they do not hide edges - there is a Mapkey setup to turnoff - F10 - and turn on - F11 - curves.

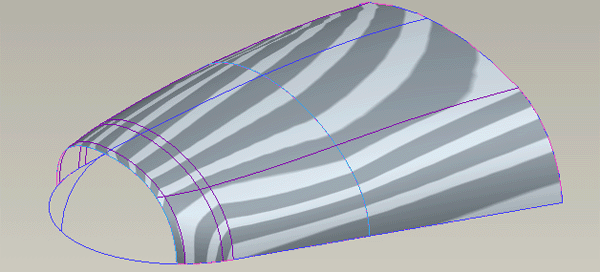
Zebra stripes
Simulates a mirror finish on your part in a black and white stripe environment. These stripes are then reflected across boundaries and you can visually check continuities.
Section analysis
This tool with analyse the curvature of multiple cross sections. We are looking for a smooth change in curvature along the section.
![]() icon in analysis toolbar
icon in analysis toolbar
Ctrl pick the surfaces to be analysed
Select a planar surface or datum plane to which the cross sections will be parallel.
Change the number of sections and drag the position of the first and last section.
Adjust the scale of the curvature spines.