![]() Design & Tech CAD
Design & Tech CAD
Introduction to 3D CAD modelling
Design Intent
Sketching
Intro to Creo through
the Extrude feature
Editing
the Model
Managing the Model
Robust Modelling
Revolve
Blend
Sweep
Swept Blend
Engineering Features
Edit Features
Reference Geometry
Helical Sweep
Design Intent
Consider a bicycle. It has a vertical central plane about which many of its components are symmetrical. The wheel rims are concentric to the wheel spindles. The pedal cranks are apposed to each other at 180 degrees. The wheel axis is parallel to the pedal axis. The pedal spindles must remain normal [at 90 degrees] to the mid symmetry plane.
These are fixed geometric and dimensional relationships which need to remain constant even when the other elements, such as the frame dimensions, change - this is our Design Intent.
Our design intent within a product is captured and controlled through dimensions from appropriate reference points and through geometric relationships - parallel, vertical, concentric, etc.
One of the most common intentions in product design is symmetry. This is easily and robustly captured in parametric CAD modelers.
Symmetry
In Industrial/Product Design so many of the product we design or work with are symmetrical - one half of the product being a mirror image of the other. In the design process, models are developed, modified and updated many times. Having to make a change to one side of the model and then make identical changes to the other is not an efficient way to work.

If a model is fundamentally symmetrical then this must be captured in the modeling process. In parametric CAD systems we can automate this process such that any change to the original side of the model is automatically reflected in the mirrored side.
Before starting, make sure you.......
Consider the placement of the model relative to the fundamental datum planes and use one of them as the symmetry plane. Maybe even rename it as such - CL is a common acronym for centre line which can later be migrated into engineering drawings.
Create all of the model to one side of the CL plane to the point it becomes asymmetrical.
Make sure that any features which must have a smooth transition across the mirror plane are normal to that plane [see discussion in Level 2 > Surfacing here]
Mirroring the whole model
When you want to mirror the model simply select the model name at the top of the model tree and then select the mirror function. This feature will then contain all the geometry in the model tree needed to create a robust image across the mirror plane.
Change any feature before the mirror feature the the mirrored half changes accordingly.
Having a known symmetry plane also simplifies the assembly stage.
see Edit Features for full description
Capturing Design Intent in CAD
A major reason for using CAD to design a product is to enable easy development, dimensions may change many times before a final solution is agreed upon. If the design intent is efficiently captured in the model and assembly then development is simpler, quicker and more robust.
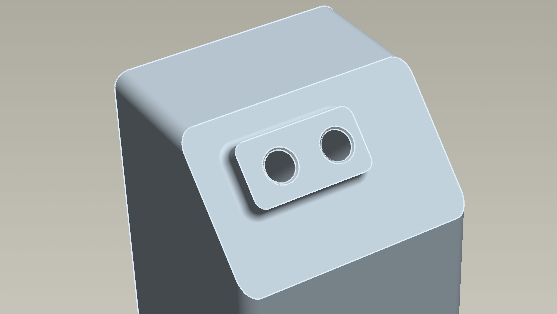
Consider the above image. If I was communicating this part to a third party, part of my description would describe a rectangular pad in the middle of the angled surface and two holes drilled into the rectangular pad.
The rectangular pad is one element and the holes in the pad are a another. Each of these elements have their own dimensions to describe them and then dimensions which place them relative to other elements. My feature dimensions and feature position relative to parent features.
The pad is placed on the angled face a distance from the side wall and a distance from the bottom edge. It is then x mm wide and y mm high. If its position changes I don't want its size to change.
The holes are x mm and y mm from the edges of the pad. If the pad moves the holes need to stay in the same place on the pad.
These two last statements are my Design Intent. This design intent needs to be captured in my dimensions.
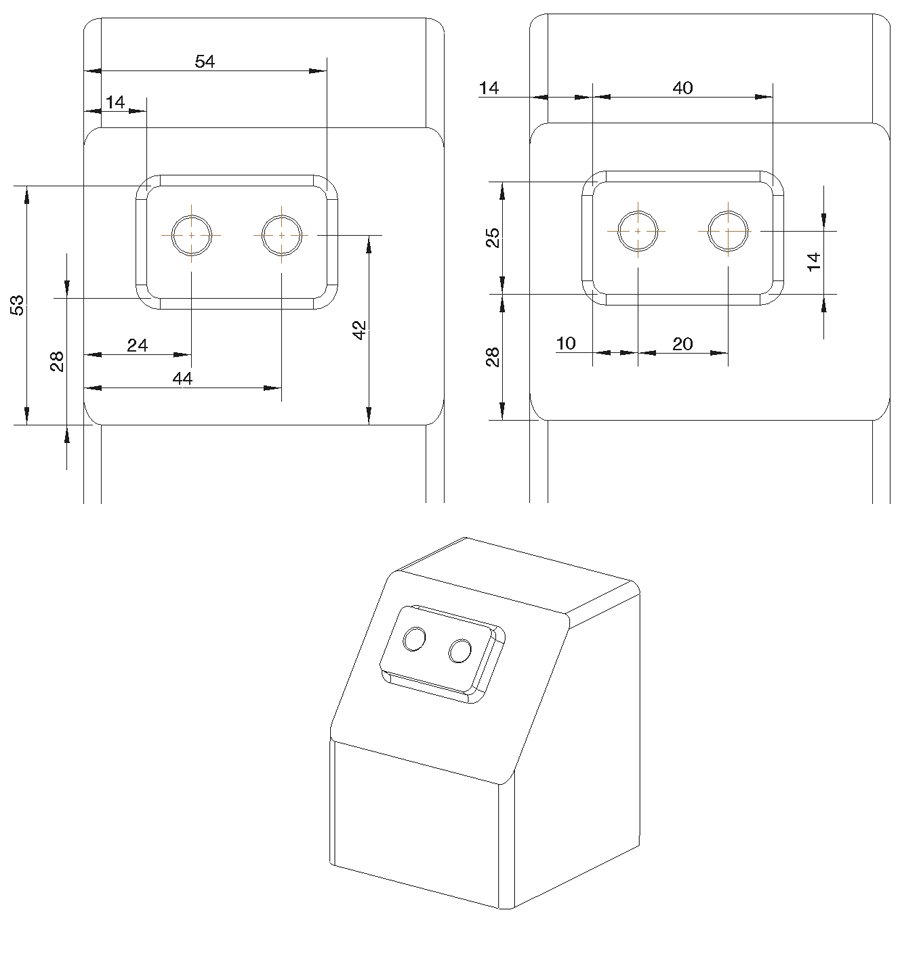
CLICK above image for larger size
If I try and move the pad using the dimensions [20 and 10] on the left the pad will also change size and I will have to change the other dimensions [38 and 45]
The dimensions on the right better capture my design intent and I can move the pad without effecting its size. But this dimensioning scheme still does not effectively capture the central positioning of the holes on the pad, ideally the holes need to be dimensioned around the centre of the pad.
Considering design intent as you model becomes more important as models become more complex and the consequences of changing one dimension become more dramatic. Getting into good habits early on will save you time as your designs become more complex.