![]() Design & Tech CAD
Design & Tech CAD
Procedure Summary
Machining Considerations
Preparation
Tooling
Mill Geometry
Setting up a machining process
Volume Mill
Local Mill
Trajectory Milling
Holemaking
Engraving
Process Manager
Tool Movement Simulation
Post Processing
CNC Procedure Sheet
CNC Machining Tool Parameters
3d Machining
Unimatic Router
ProPlastic Advisor
HyperView – Virtual ‘MCing’
Before starting Hyperview, change the file extension of your .tap file to .fnc and copy it to user_files.
Use the Job button [top left] to create a new job. Use Add to select your .fnc file. You then have to work through the Machine, Stock and Tool tabs to setup the Job before the machining can be simulated.
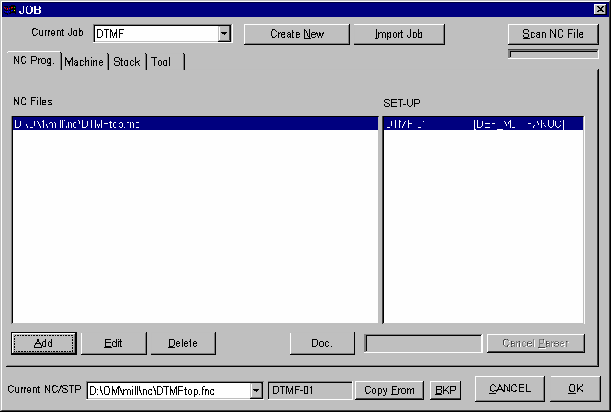
Click the Machine tab and select the Denford_mill as the machine definition.
Click the Stock tab. Choose a standard stock size from the drop down Stock Name list or ADD your stock. Check the shape is BOX then enter the material dimensions for Xlength, Ylength and Zlength.
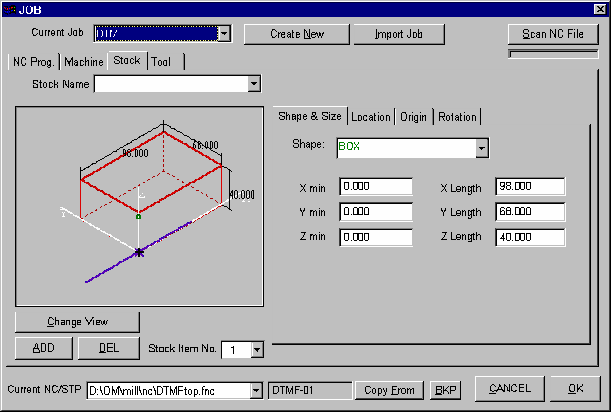
Click the Origin tab and set Z origin [the green dot] to TOP. This is your Machine Zero.
Move to the Tool tab to setup your cutting tools. You can load a default tool library as a starting point through Load T.LIB., otherwise create your own tools. Make sure the Prog. no. is the same as the tool number in your .fnc code.
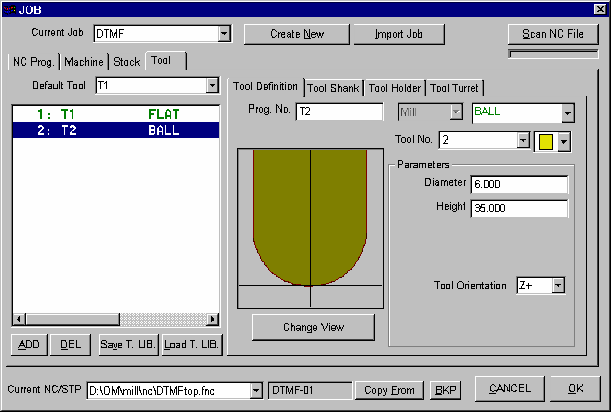
Select the tool type as flat, ball, etc. Enter the tool Diameter and Height - greater than the total depth of cut.
Click OK at the bottom right of the window and the job should process. The Preview button – red cube – will set up the ‘virtual’ material block ready for machining. Maximise all the windows.
Use the View [eye] button to set the stock in an appropriate orientation, then simulate the NC file using the Go/Stop button .
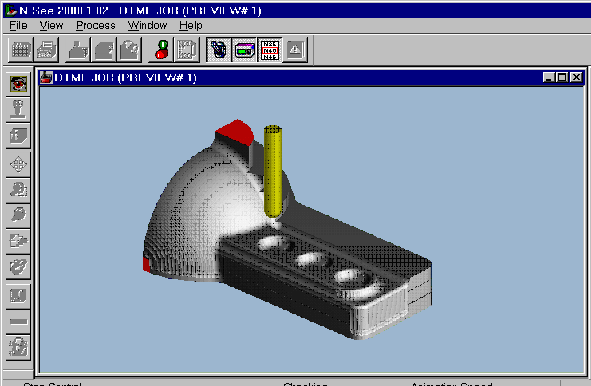
Watch the simulation carefully – change the animation speed at any time to allow a better analysis.