![]() Design & Tech CAD
Design & Tech CAD
Procedure Summary
Machining Considerations
Preparation
Tooling
Mill Geometry
Setting up a machining process
Volume Mill
Local Mill
Trajectory Milling
Holemaking
Engraving
Process Manager
Tool Movement Simulation
Post Processing
CNC Procedure Sheet
CNC Machining Tool Parameters
3d Machining
Unimatic Router
ProPlastic Advisor
For machining complex line work at a single depth such as a logo. See Level 2 Modelling > Geometry from 2D graphics for some info on exploiting logo images.
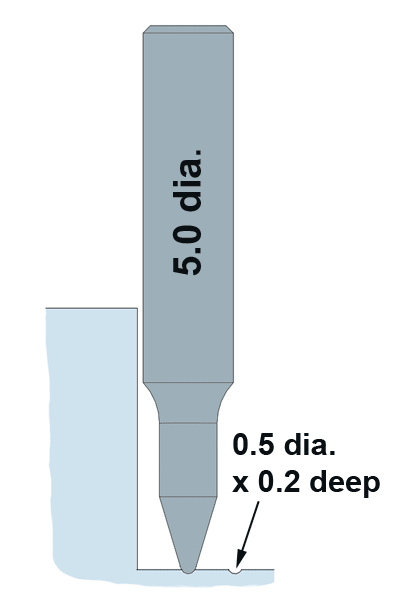
Define the engraving tool as 0.5mm diameter and machine to 0.2mm depth. The shank of the tool is 5.0mm - watch for collisions with side walls in cavities - see below
In your Reference Model part file generate a Groove [cosmetic] feature
- Insert > Cosmetic >
Groove. [This function is in the old 'Menu Manager' style]
- Choose the surface you want to project the feature onto
- Choose the sketch plane
- Choose a plane to orient the sketchplane
- Sketch the curves
Pick the Engraving from the top toolbar
- Tool
- Parameters > set the usual parameters, do not set NUMBER_CUTS
- Parameters > make sure you set a GROOVE DEPTH
- Groove feature