![]() Design & Tech CAD
Design & Tech CAD
Procedure Summary
Machining Considerations
Preparation
Tooling
Mill Geometry
Setting up a machining process
Volume Mill
Local Mill
Trajectory Milling
Holemaking
Engraving
Process Manager
Tool Movement Simulation
Post Processing
CNC Procedure Sheet
CNC Machining Tool Parameters
3d Machining
Unimatic Router
ProPlastic Advisor
Tooling
* See the Parameters section for tool spindle speeds and feedrates
You will need to ensure that all the tools you need – these will be in your CNC procedure sheet - are setup within the machine setup. You can enter the tooling setup through Menu manager > Mfg Setup > Tooling. Or whilst editing the sequence - setup > tool
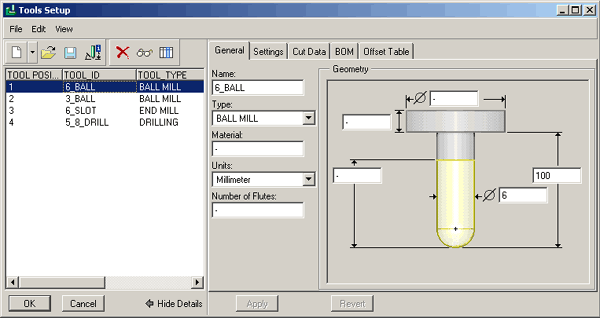
Setup the:
number - in setting - do not repeat
name - give it a logical name
type - ball mill, end mill, drill, etc.
geometry - dia., length and ball radius if applicable
and then apply to the tool list.
Make sure each tool has a distinct number [not name] as this is the only information which is transferred to the final CNC file
Ensure that all tools feed more slowly vertically into materials than horizontally through material - parameters > advanced > horizontal feed
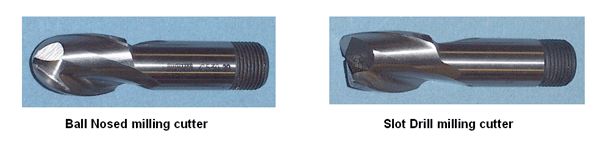
Slot drill - Flat bottomed cutter which can feed vertically down into material. Vertical feedrate needs to be less than horizontal feedrate
Ballnosed cutter - the corner radius of the tool is equal to the major tool radius. Can feed vertically down into material. Vertical feedrate needs to be less than horizontal feedrate
Drill - standard 118 degree point helical fluted drill
Engraving tool - a simple 'burr' tool with a pointed end. The main body of the tool is 6mm diameter and will therefore need 3mm clearance around the tool path.